
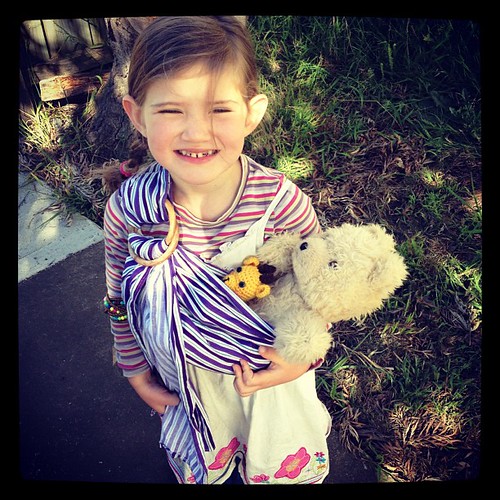
When my eldest child was 1 she used to try to wear my ring slings and carry her teddies in them. There was of course, way too much fabric, which tripped her up and didn't hold her baby snug against her, because it was adult sized. So I found instructions online for sewing ring slings and adjusted the measurements to suit my daughter's little body.
The instructions I used were from Sling A Ma Bob, which I've since used to make adult sized ring slings as well. Though, over the years I've changed the way I fold the fabric over the rings before sewing the rings in.
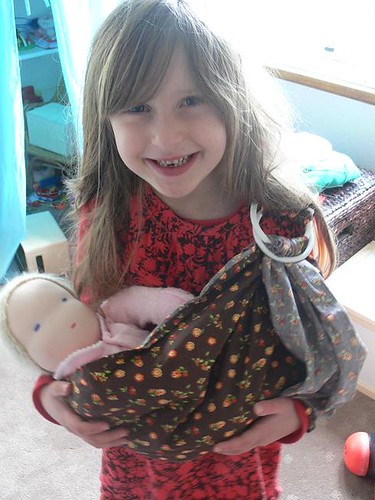
My very first ring sling was made back in 2009 (pictured left in 2011 and is still a favourite toy today). I've since made many of these little slings as gifts for her friends as well :) Here are just a few:
It was remarkably easy to do and since
she won't be carrying actual children in the sling it doesn't need to
be made out of expensive materials or fabric and rings that can support
the weight of growing kids.
Here's how I did it:
You will need
Here's how I did it:
You will need
- 1.5 metres of fabric that you can imagine pulling through rings with ease. Cut to make it 55 cms wide (1.5m was slightly too long for my 18 month old, it almost touched the ground when she wore it, but she grew into it and has been wearing it for 4 years)
- 2 rings (we used wooden rings intended for hand bag making, but plastic bangles are an even better idea)
- Sewing machine/cotton thread
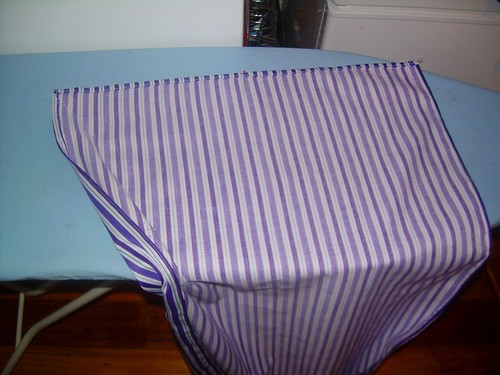
Cut fabric to ensure you have 1.5 metres length and 55cms width (you will lose approximately 2cms when heming the edges)
Hem all the edges of your fabric (fold edges over 0.5-1cm, iron flat, fold over again and iron again, pin to keep it secure, sew)
Hem all the edges of your fabric (fold edges over 0.5-1cm, iron flat, fold over again and iron again, pin to keep it secure, sew)
Once
all the edges are hemmed, lay the fabric out with the outside/patterned
side down width-wise (you don't need to worry about the length for the
time being).
Find the centre of the fabric, you mark it with a pin.
Fold one edge over, in to the centre:
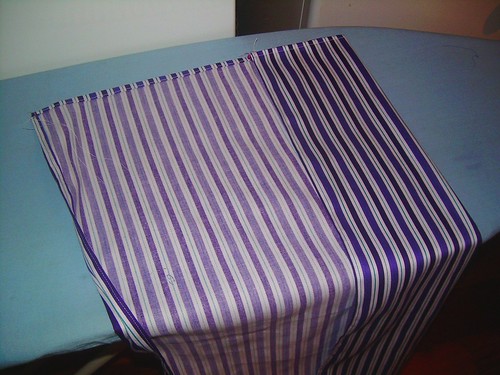
Then fold the other edge in to the centre:
Repeat (you are reducing the width of one end in order to put rings through it and then sew them into the sling)
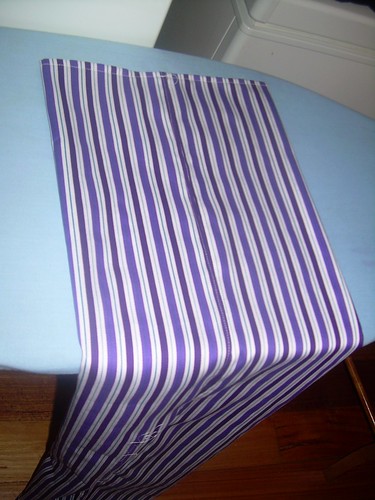
Slide the folded fabric through your rings.
Slide the rings approximately 40cms down from the hem
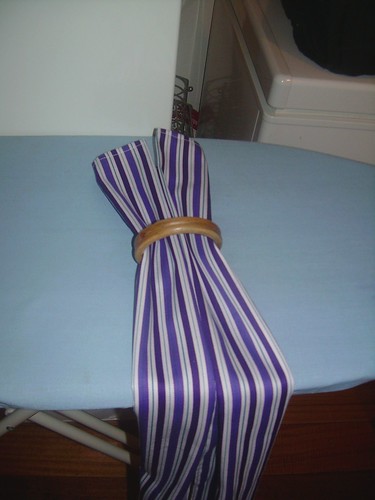
Take the fabric which has gone through the rings and fold it over the rings,
Take the hemmed end that has gone through the rings and fold this back towards the rings,
This
will half the length of excess fabric you have through the rings and if
you tuck the hemmed side undearneath, the hem will disappear from view
in a minute when you sew over the fold, locking the rings into place:
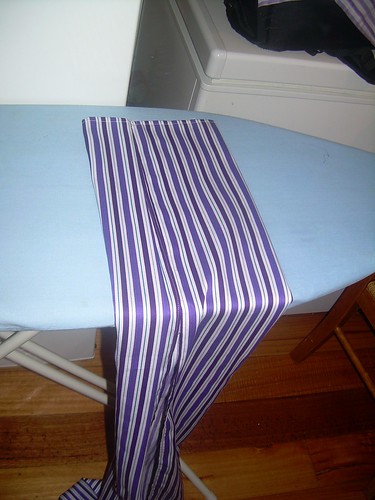
Sew a zig-zag stitch along the neat fold:
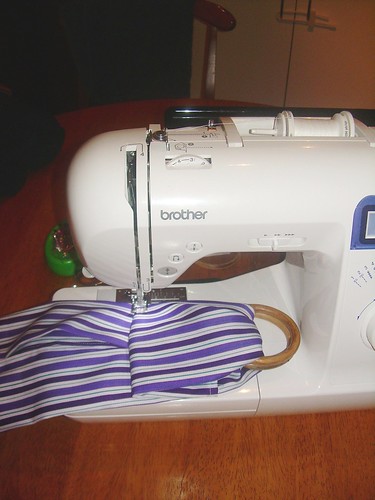
Continue sewing with the zig-zag stitch.
You can create a box (as I did in the pic below), but over the years I've found the box a waste of time and instead sewn back and forth, leaving 3 lines holding the rings in place.
Make sure the rings aren't too close to the foot of your sewing machine, or everything will jam
(as
you can see in the pic below first time I tried to sew a much larger
box, but got too close to the rings and couldn't sew the final line
across the top of the box):
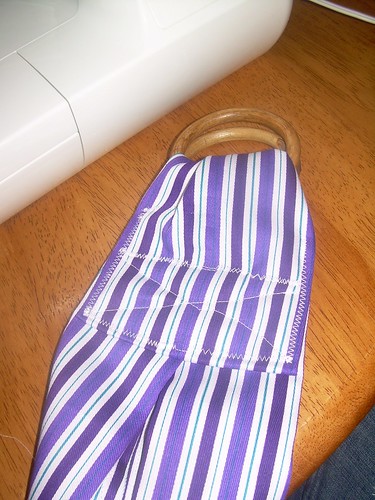
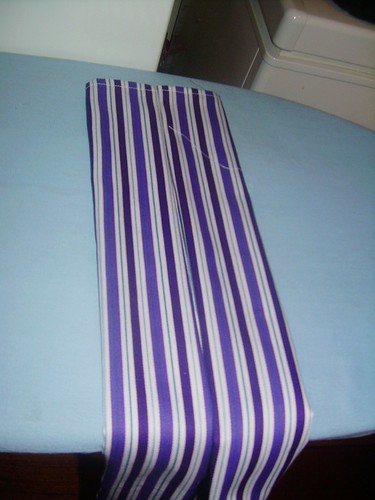
Voila!
Now that your rings are sewn into the fabric, can move but won't escape your ring sling is complete.
All you need to do now is thread it (see here for instructions) and help your child put it on and secure teddy inside :)
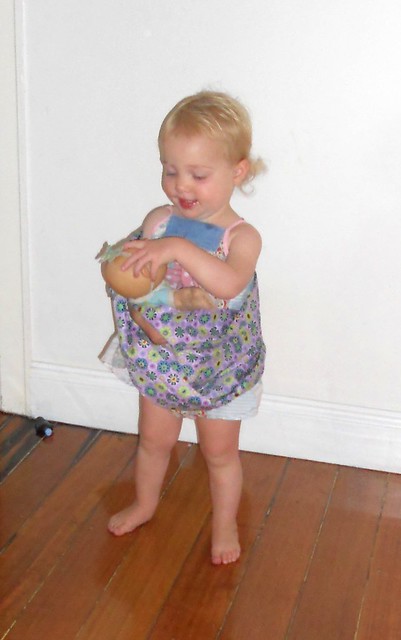
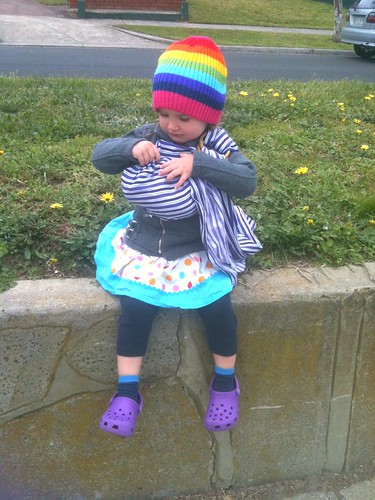
 |
| twin toy-wearing in 2012 |
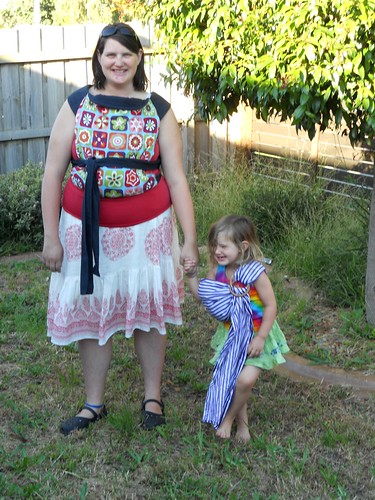
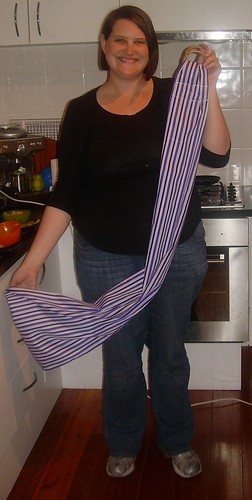
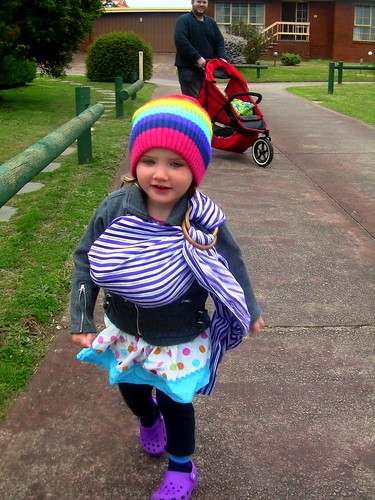
The
same instructions can be used to make an adult sized ring sling. You
just need different sized (quality) fabric and proper rings intended for ring
slings. For an adult sized one be mindful of sturdy, high quality
materials so that the children who are carried in your sling are safe.
To put on the ring sling hold the sling
- let your child choose which side he or she would like the rings on, put his/her opposite arm and head through the pouch/opening of your sling.
- Slide the fabric down away from child's neck and spread it across his/her shoulder and back.
- Slide the sling around so that the rings are positioned up on child's shoulder, quite high (the reason for this is that once you put teddy in the sling and then pull the tail through the rings to tighten it, the pulling action will cause the rings to slide down into the most comfortable position - over your child's collarbone).
- Put teddy inside the pouch of your sling (make sure there is fabric between your child's body and teddy so teddy doesn't fall out.
- To tighten the pouch so that teddy is hugged to your child's body safely pull the tail through the rings further.
- To tighten just one side of the pouch (either the top near teddy's head or the bottom hiding between teddy and your child's body), pull just one edge of the tail.


No comments:
Post a Comment