Showing posts with label sewing. Show all posts

Monday, April 29, 2013

Dinosaur Themed Craft

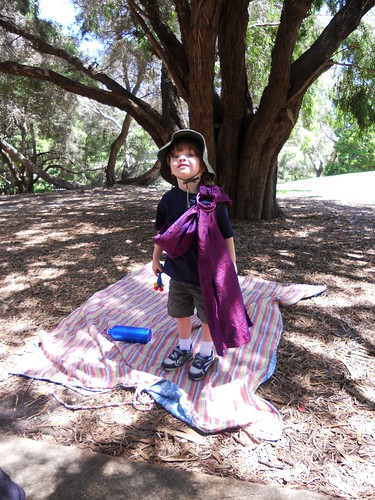
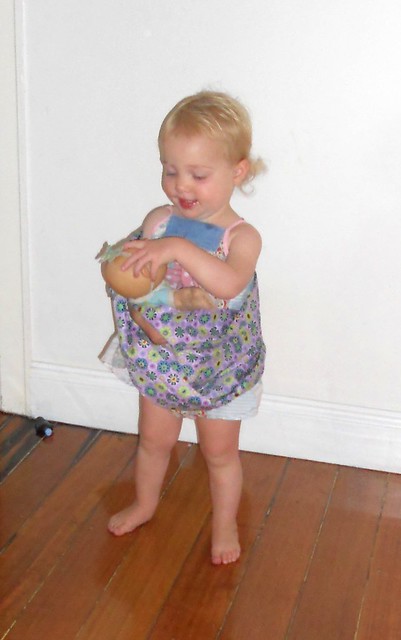
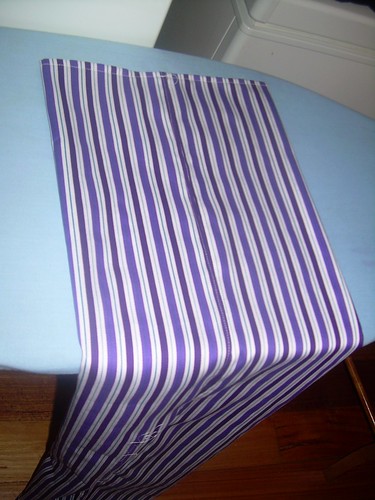
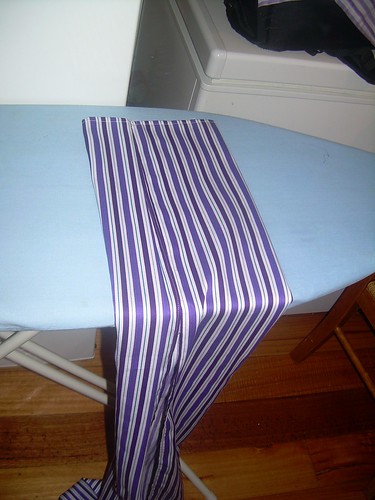
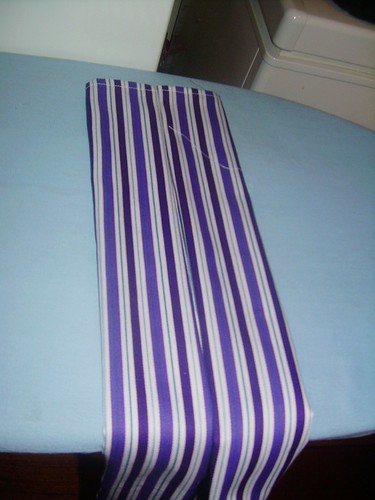
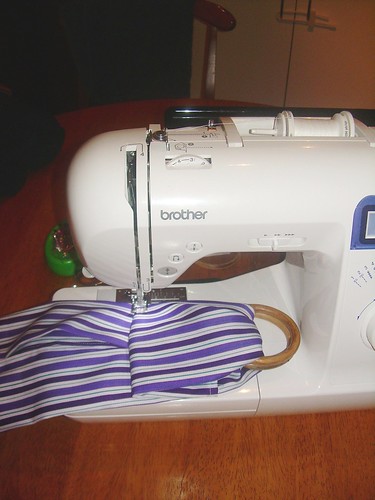
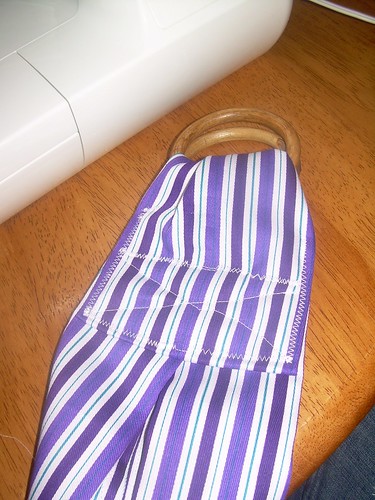
When our eldest was 2-3 years old she had a thing for dinosaurs, one of our favourite interests of hers :) she even has dinosaur bedsheets from that period. When she was 2, my friend Saree designed a dinosaur tail pattern to sew  for her daughter's dress-up collection and she generously shared it (and her felt and cotton and elastic and stuffing and sewing machine!) with me, so that I could make one for my daughter:


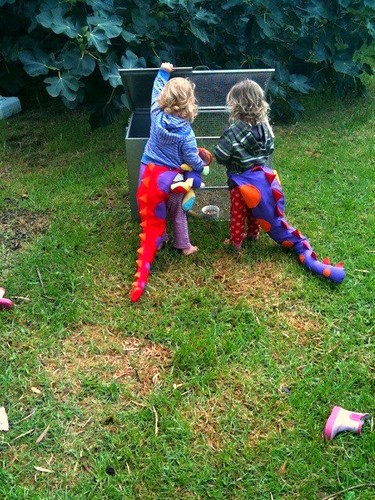
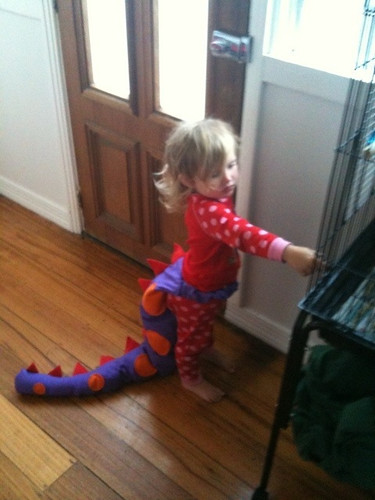
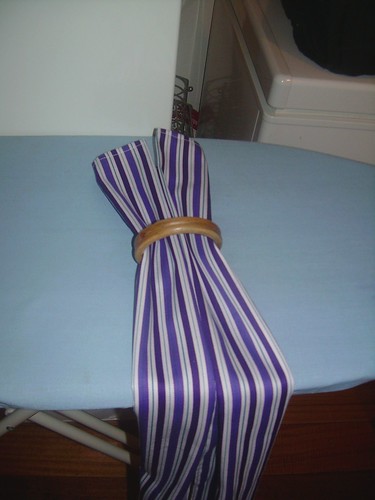
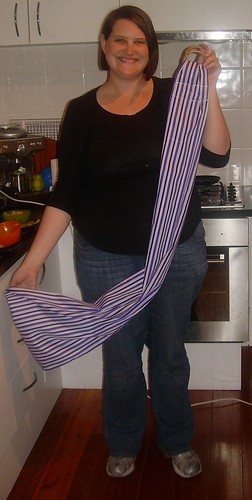
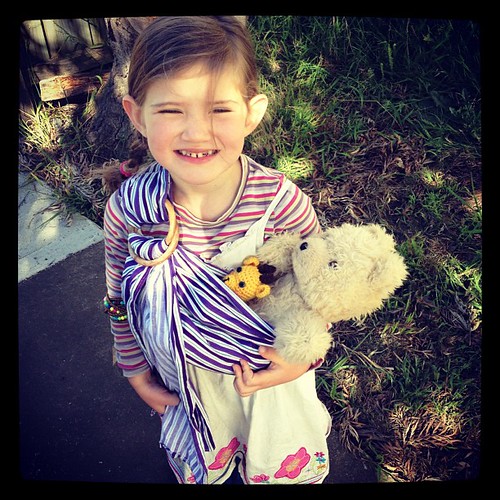
This purple tail remains is still a hit with the kids, and hangs on the back of edlests' bedroom door. Actually, writing this has made me think I should get onto making one for our second daughter too.

At the height of her dinosaur phase, we threw edlest a dionsaur themed birthday party. I created these invitations for her guests:


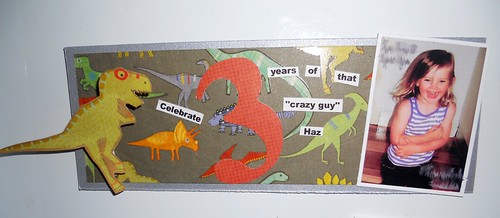
They read "Celebrate 3 years of that 'crazy guy'" because back then she used to refer to herself as "Crazy Guy", it was HILARIOUS, we have no idea where she got it from, but it was apt (well, except for the "guy" part, technically, lol). I had two different sheets of dinosaur themed scarpbook paper, one with larger dinos on it, which I cut all the T-rexes from to create a pop-up on the side. The back of that sheet was brown and patterned and worked with the rest of the colour scheme so I made the number 3s from that. And used the other sheet with small dinosaurs as the background.

I also used magnetic strips on the back of the invitations so they would stick to the fridge themselves. And I wacked all the details such as time, date and address on the photo of her.


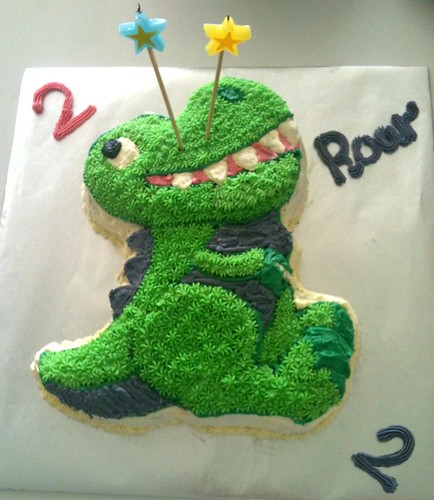
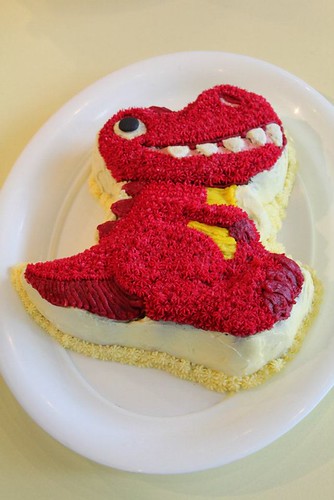
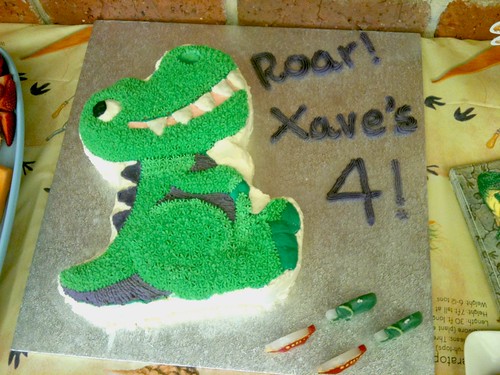
For her birthday cake, I invested in a Wilton dinosaur cake pan and embarked on piping for the very first time (this was at the start of 2011). 

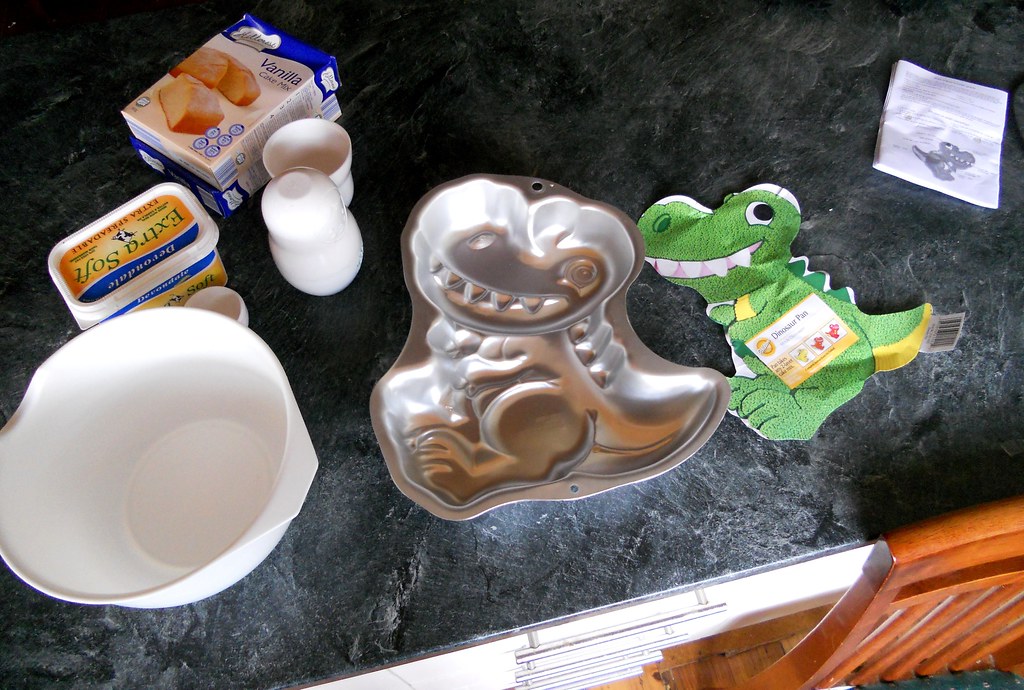
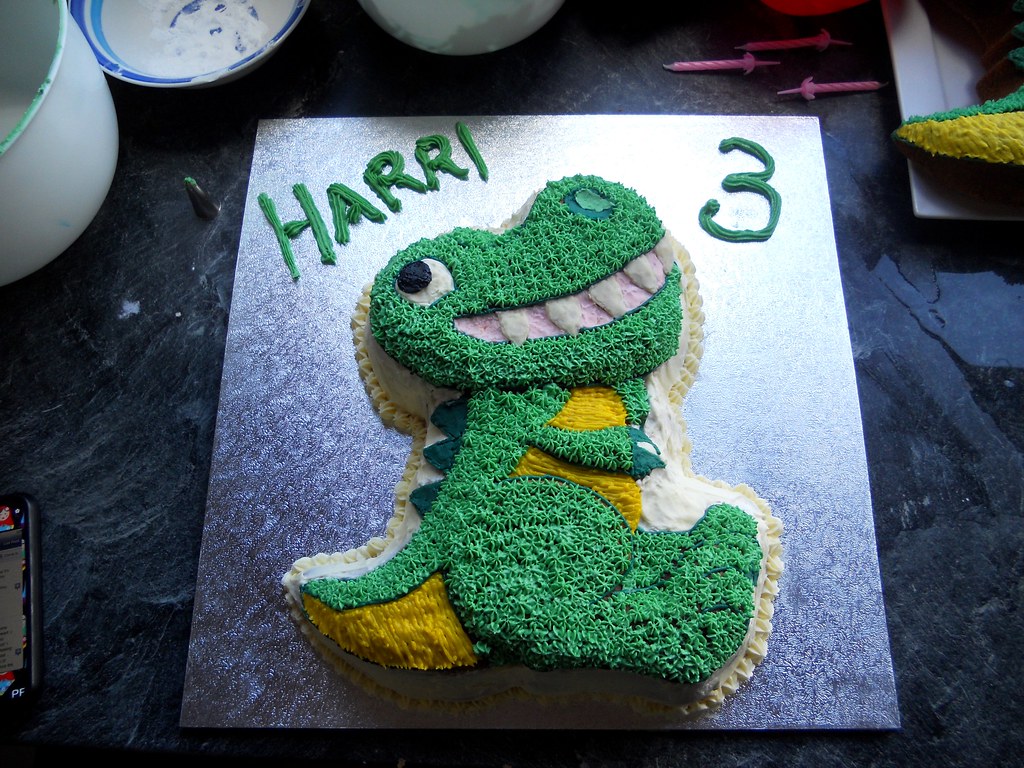
Once I got the hang of piping (I made many a practice dinosaur cake. By the time her party came, our family was so sick of cake lol!) I found that it wasn't challenging, just time consuming. But for how it looks at the end, it's really ace. I'm a bit of a fan of the Wilton cake pans and their piping instructions.

I had worried that it would be a waste buying a cake pan just to use for one birthday, but I was happily wrong. I've made many a dinosaur cake for friends birthdays and loaned the cake pan to others and I have no doubt we'll use it again for our second born at some stage and this baby still in my belly, some day.


And thus concludes my dinosaur crafting to date :)

Saturday, April 27, 2013

Superhero Costumes

 Last year one of our eldest child's friends had superhero themed birthday. It was such a fun theme and simple to transform my family from every day citizens into their heroic alter egos ;)


I used felt to create the girls' superhero emblems and some sequined fabric that I will never ever use again. That fabric was so fiddly and moved around heaps and frayed, ugh, it was awful. But it did give a good result. I made two emblems each for the girls: one I sewed onto the back of their capes and the other on the front of a plain black shirt. 

I also used felt to create the girls identity-protecting eye masks. And again used the awful sequined fabric, cutting out their iniitals and hand sewing them onto the masks. I also made a couple of masts for Huz and I.
Their capes were made from plain cotton, hemmed, and then a series of small cuts were made towards the top of the fabric and a ribbon of the same colour cotton was threaded under and over each cut to make a neck.

The finishing touch was a great find at K-Mart: black leggins lines with silver sequins up and down the side seams. Easy, fun, and a great addition to the dress-up box after the party :)

Monday, April 22, 2013

Dresses

Back in the day when I was firmly attached to a belief that I would not, could not sew a stitch (thank-you very much traumatising textile teachers from high school!) my friend Saree was determined to convince me otherwise. She sat with me for hours, sharing her machine and a pattern and donating beautiful corduroy fabric to the cause and with her help I sewed my first ever project that was not made in a fog of humiliation and tears: a very sweet dress for my then one year old.


For the first time in my life, I created something out of fabric without being graded, or watched by the eyes of a middle-aged woman full of disdain for my very being. I was not scolded for not concentrating hard enough and talking too much. I sewed! And not just some shitty pencil case or pin cushion, a dress! A beautiful, practical, dress for the person I loved most in the world :) 


This was a huge turning point in my life. At the time I was trying to reconnect with my long-lost creative side by hand making greeting cards, something new for me. I'd never been into hand crafts. A very big reason for this was that my experiences with craft at school had been so demoralising that the lesson I'd walked away from those years with was: you can't do craft. This broke Saree's heart and she didn't let me spend another minute believing that :) After making that dress I went on to learn cross stitch, try my hand at sewing more things, and eventually I came to identify as craft-competent and now I LOVE crafting. And I also had another daughter who the special dress was passed on to :D

Here is Saree's eldest and mine in those cord dresses (photos by Saree's very talented mother, as are the 1st two images in this post):

The cord dress was sewn in March 2009. In December Saree had another dress pattern she shared with me. This time I shopped for my own fabric and once again we sat down together and worked away. The straps for this dress required bias binding, which Saree did for me, and she helped get me started on gathering the part beneath the solid sash. The end result remains one of my favourite items of clothing and has been worn (again) by both my daughters. Initially it was sewn to be our eldest's special Christmas Day dress :)


And here is Saree's eldest and mine in their complementing Christmas outfits, December 24th 2009:


And our little family on Christmas Day 2009 at Huz's parents' place:

That was our whole family back then! The following Christmas was my due date with #2 :)

My machine sewing hasn't really taken off (aside from the ring slings), as I've found other craft mediums I enjoy more, but I reflect on projects like these gorgeous dresses and think to myself that I really should make some more :)

Sunday, April 21, 2013

Shoulder Bags & Lotus Birth Bag

In 2009, my friend Saree helped me sew a shoulder bag, using the Lickety Split pattern from Made by Rae. I gave the finished product to one of my sister's for Christmas later that year:


Saree gave me so much help with this project, that when I went to sew a second bag for myself I really struggled. I ended up getting it half way done and then letting it sit on the shelf for a year. 

When I did get it out again and decide to finish it off (this time with more confidence and a lot less bugging Saree lol) I was heavily pregnant with my second child and had decided I would use the bag to store our baby's placenta in during our lotus birth (the first few days of life when baby, cord and placenta remain attached until they naturally detach).

We wrapped the placenta in a damp towel and a piece of PUL fabric before placing it in the bag so the bag didn't get damp.


Once she was lotus born I went on to use the bag as a handbag for aaaages. I used it so much the fabric faded and then I decided to put it away for safe keeping.

Saturday, April 20, 2013

Birth Flags & Quilt Squares

A few of my homebirthing peeps have invited friends to create "birth flags" for them to display in their birth space, to have something gorgeous and meaningful with them, from those who care. Standard practice is that the pregnant woman sources fabric and sends it to everyone who wants to participate: to decorate and send back in time for the birth. Participants are free to use any crafty medium for their flags. Some mummas have more specific instructions, for example keeping to a particular colour. To date I've created three flags, and so far I've sewn each of them.

For Sheree I decided to create an image of lotus born baby: a child with an attached cord, still one with her placenta, because I know lotus birth is one of Sheree's birth loves. I used felt and machine sewed my picture:

September 2010

My only regret is that I didn't think to sew some more detail into the baby. A line of stitches for an arm and some legs and a little smile and closed eyes would have really finished it off beautifully.

For Owletmama I machine sewed a felt yoni/candle flame symbol in red. Five years ago when I was training to become a doula I learned about Ilithyia, the goddess of childbirth and that one of her symbols was candlelight, a reference to how she guides unborn babies to the light of life. I began doodling an image that could be seen as both a flame and an opening yoni and I haven't stopped doodling it since, lol.

September 2010

If I had a do-over, I'd hand sew this, as I could have controlled the fabric better that way, it got a little gathered as I raced through stitches on the machine.

For apwool I hand sewed/embroidered her circular calico with a short-haired birthing woman, ready to catch her crowning babe. She requested that participants stick to green and yellow only. I found a really nice multi-coloured DMC floss, which featured both colours:

February 2012

I drew the image onto the calico in light grey-lead pencil first and then stitched over the lines. And yes, I took creative license with the birthing woman's physiology, I like cubism, get stuffed ;)

Other women have asked their friends to create a quilt square to contribute to a blanket the mother sews for her baby, comprised of many squares from the extended community.  I have done two quilt squares, both in felt. The first I used a hot glue gun to put the pieces together to create an opening yoni and the second cotton and felt hand sewn onto cotton:

August 2010
January 2012
The latter quilt square was made from three different and significant pieces of fabric from my stash. The base fabric I used to sew a bag to carry my second child's placenta in during our lotus birth and this was some of the left over fabric. The flowers were from a fabric I had used previously to make a ring sling for this mother and her older child. And the butterfly wings were made from fabric I adored and hadn't used since sewing my eldest a dress (one of my early sewing machine projects) because it was so dear to me that no project seemed worthy of it, until this square.


Thursday, April 18, 2013

Ring Slings for Baby & Toddler Wearing

In my previous post I shared a tute for how to make kiddy sized ring sling toys. Once I'd mastered sewing those (in 2009) I moved on to sewing them in adult sizes, with better quality material and reinforcing the rings by going over the stitches securing the ring multiple times.

The pattern I used to get started was from Sling A Ma Bob, but over the years I've evolved; working with different measurements and folds (used to feed fabric through rings before sewing them in), I haven't looked at a pattern for ring slings in years.

The rings are proper ring sling rings manufactured for carrying baby and toddler weight and I order them online from slingrings.com. I always order the large sized aluminum rings when making adult sized slings. 

These days when making slings I pleat the fabric that sits over the adult's shoulder, before sewing the rings in. Earlier I did the "hot dog fold" mentioned in the sling a ma bob instructions, but found sewing over that number of folds was really hard going on my machine and I ended up using a denim needle. Over time I moved on to just pulling the fabric through and not bothering with folds, until finally settling on pleats, in which I found a balance between looking neat and not having too many layers of fabric to sew through. Here are a few of the ring slings I've made since 2009:


As you can see ring slings are suitable for wearing newborns (like the bottom left shot of my sister wearing her brand new baby during a hands-free breastfeed lol) to toddlers (the top right photo shows me wearing my 3 and a half year old in a sling I made for a friend). They can do hip, cradle and heart to heart carries, as shown, but also kangaroo carries (where babies are sitting up facing out, with their legs crossed inside the sling) and also apparently back carries, though I've never attempted it myself.

I really adore ring slings for wearing newborns and babies who want to get up and down a lot - such as the newly walking. I love that ring slings are easy to adjust while you're wearing the bub, no need to take it off and start from scratch with a ring sling, just pull at rails as you go. And most of all, I just love the funky look of the one shoulder sling and rings, even before I had kids I thought ring slings looked really cool. Of course the one-shoulder style carriers are not for everyone, but they are the slings I can sew ;)

And, just while we're on the subject of ring slings, I'll share this: one of my all time favourite pics of my Huz on one of the only times he's used a ring sling (he's a soft structured carrier/mei tai man, and stretchy wraps in the newborn days). Wearing our very tired eldest when she was 13 months old:

I didn't make this one, we bought this online when pregnant the 1st time
What a spunk! Ring slings make you look gooood ;P

Wednesday, April 17, 2013

Child Sized Ring Sling Toys


When my eldest child was 1 she used to try to wear my ring slings and carry her teddies in them. There was of course, way too much fabric, which tripped her up and didn't hold her baby snug against her, because it was adult sized. So I found instructions online for sewing ring slings and adjusted the measurements to suit my daughter's little body. 

The instructions I used were from  Sling A Ma Bob, which I've since used to make adult sized ring slings as well. Though, over the years I've changed the way I fold the fabric over the rings before sewing the rings in.

My very first ring sling was made back in 2009 (pictured left in 2011 and is still a favourite toy today). I've since made many of these little slings as gifts for her friends as well :) Here are just a few:


It was remarkably easy to do and since she won't be carrying actual children in the sling it doesn't need to be made out of expensive materials or fabric and rings that can support the weight of growing kids.

Here's how I did it:

You will need
  • 1.5 metres of fabric that you can imagine pulling through rings with ease. Cut to make it 55 cms wide (1.5m was slightly too long for my 18 month old, it almost touched the ground when she wore it, but she grew into it and has been wearing it for 4 years)
  • 2 rings (we used wooden rings intended for hand bag making, but plastic bangles are an even better idea)
  • Sewing machine/cotton thread
Method
Cut fabric to ensure you have 1.5 metres length and 55cms width (you will lose approximately 2cms when heming the edges)

Hem all the edges of your fabric (fold edges over 0.5-1cm, iron flat, fold over again and iron again, pin to keep it secure, sew)

Once all the edges are hemmed, lay the fabric out with the outside/patterned side down width-wise (you don't need to worry about the length for the time being).


Find the centre of the fabric, you mark it with a pin.
Fold one edge over, in to the centre:


Then fold the other edge in to the centre:


Repeat (you are reducing the width of one end in order to put rings through it and then sew them into the sling)


Slide the folded fabric through your rings.
Slide the rings approximately 40cms down from the hem


Take the fabric which has gone through the rings and fold it over the rings,
Take the hemmed end that has gone through the rings and fold this back towards the rings,
This will half the length of excess fabric you have through the rings and if you tuck the hemmed side undearneath, the hem will disappear from view in a minute when you sew over the fold, locking the rings into place:

Sew a zig-zag stitch along the neat fold:


Continue sewing with the zig-zag stitch.
You can create a box (as I did in the pic below), but over the years I've found the box a waste of time and instead sewn back and forth, leaving 3 lines holding the rings in place.
Make sure the rings aren't too close to the foot of your sewing machine, or everything will jam
(as you can see in the pic below first time I tried to sew a much larger box, but got too close to the rings and couldn't sew the final line across the top of the box):


Voila!
Now that your rings are sewn into the fabric, can move but won't escape your ring sling is complete.


All you need to do now is thread it (see here for instructions) and help your child put it on and secure teddy inside :)

twin toy-wearing in 2012
Ta-Da!

In 2010: me wearing baby sister, her wearing baby doll

The same instructions can be used to make an adult sized ring sling. You just need different sized (quality) fabric and proper rings intended for ring slings. For an adult sized one be mindful of sturdy, high quality materials so that the children who are carried in your sling are safe.

To put on the ring sling hold the sling
  1. let your child choose which side he or she would like the rings on, put his/her opposite arm and head through the pouch/opening of your sling.
  2. Slide the fabric down away from child's neck and spread it across his/her shoulder and back.
  3. Slide the sling around so that the rings are positioned up on child's shoulder, quite high (the reason for this is that once you put teddy in the sling and then pull the tail through the rings to tighten it, the pulling action will cause the rings to slide down into the most comfortable position - over your child's collarbone).
  4. Put teddy inside the pouch of your sling (make sure there is fabric between your child's body and teddy so teddy doesn't fall out.
  5. To tighten the pouch so that teddy is hugged to your child's body safely pull the tail through the rings further.
  6. To tighten just one side of the pouch (either the top near teddy's head or the bottom hiding between teddy and your child's body), pull just one edge of the tail.
Enjoy :D