Saturday, May 4, 2013

Rainbow Crochet Gifts

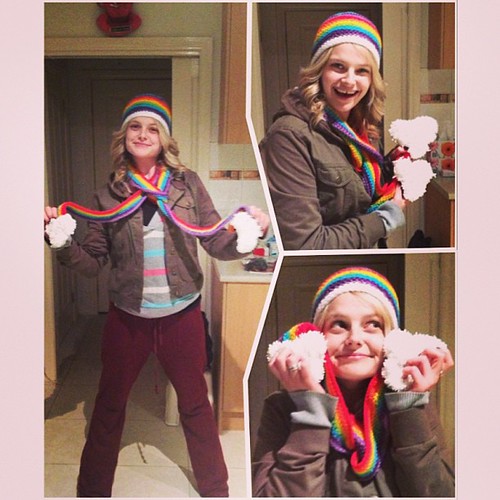
For my littlest sister's birthday this year I got hookin' with the 7 colours found in the rainbow. The year before last I pinned this, totally in love with the idea of a rainbow scarf, but not so in love with the heart. 

 
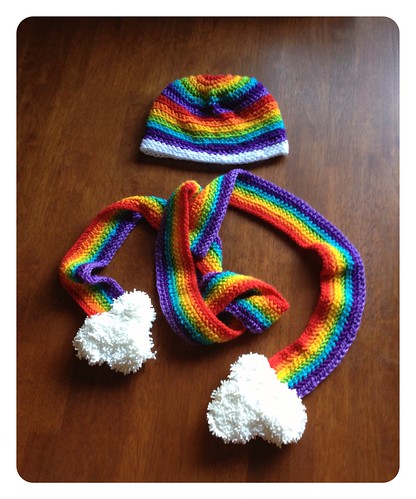
Once I knew enough crochet, I decided to have a crack. I didn't really follow the tute initially, just chained as long as I wanted and then double crocheted in each colour until I was done. But I did use it to get me started on the clouds, with some adjustments as I didn't need to make them as big with the yarn I had. A nice little coincidence of making them the way I did was that they turned out looking a little like love hearts, which wasn't my plan, but cute.


For the clouds I used a Lincraft brand yarn called "giggles" which was a massive pain to work with, but ended up getting the result I was after and my sis just loves them. She tells me she plans to use the clouds to help deal with stress by giving them a good squeeze when she needs, lol.


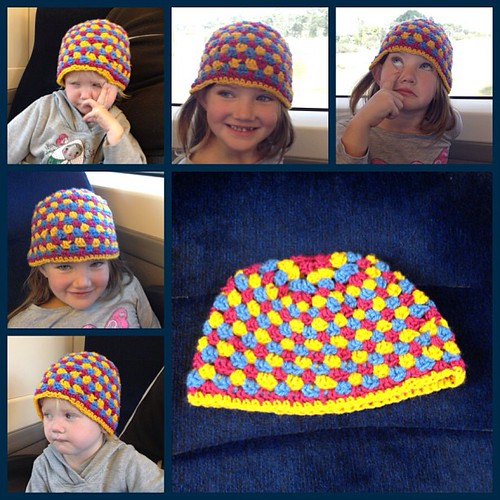
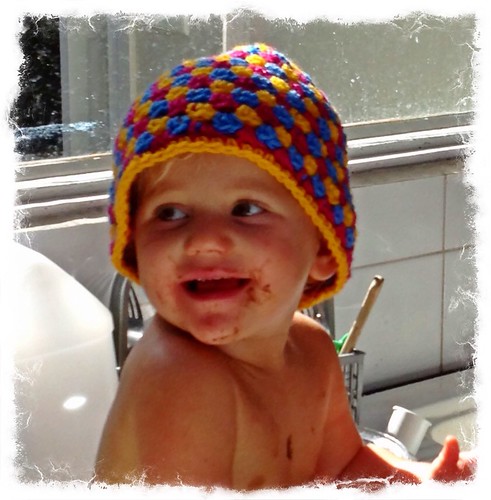
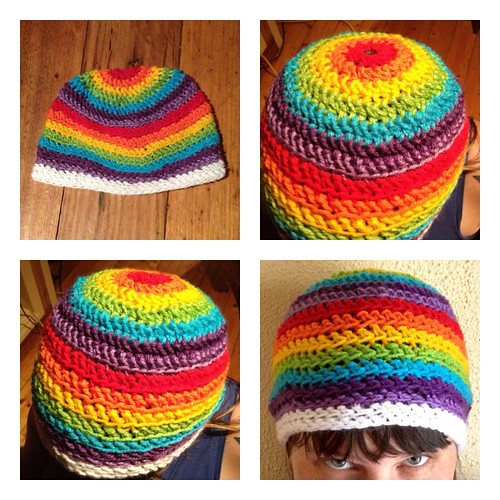
For the hat I used this tutorial. My stitches were quite tight so I added another row and did 2 in white for the cloud at the bottom of the double rainbow :)

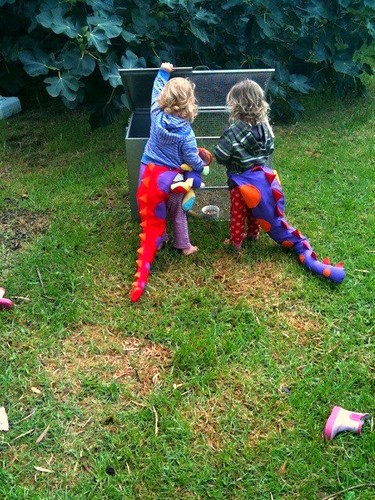
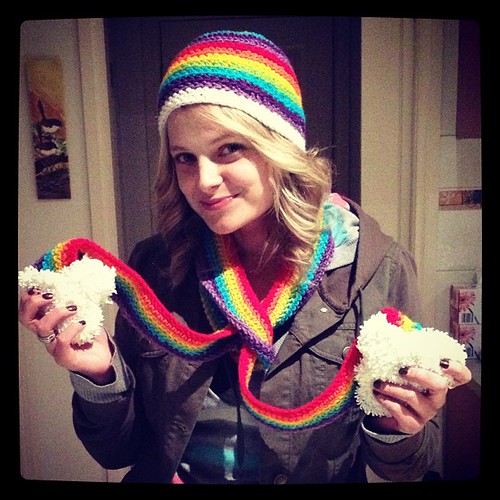
Despite the 3 months wait, Sis was delighted with her belated rainbow birthday gifts and oh my, how cute she made them look!


Friday, May 3, 2013

Xmas Cards in 2009

Inside them Huz wrote a quote about peace by Dorothy Thompson:
"Peace is not the absence of conflict but the presence of creative alternatives for responding to conflict - alternatives to passive or aggressive responses, alternatives to violence."
And we also glued paper notices to the inside of the card letting the receiver know that a donation had been made to the War Widows Guild of Australia on their behalf. We donated $3 to War Widows for every card :)

Thursday, May 2, 2013

Owl Themed Craft

For Presh's 2nd birthday we had an owl themed birthday party. I chose owl because her 2nd birthday marked the two year breastfeeding milestone, which is the minimum recommendation for breastfeeding duration made by The World Health Organisation, or WHO as they are more commonly referred as. Who! Who! Get it?


Not only was the owl in the centre on pop-up foam squares, but all her body parts too! Double popped.

For her cake I created my own owl design, using chocolate cake, chocolate icing, seven banana lollies, and two fun sized flake chocolate bars. The eyes were not my own design: two halves of two oreo biscuits and two brown MnMs:


I got the idea from this recipe for owl cupcakes but tweaked it (eg. making a cake instead of cupcakes, using different lollies for ears, talons and beak, adding flake, and cutting two triangles out of the sides to create the illusion of a separate head and body).

It was chocoliciously delicious.

Presh on her birthday in an owl themed dress made for her


Wednesday, May 1, 2013

Babushka/Matroyshka Invitations

When I was pregnant with each of my girls I had a blessingway (or mother shower - an alternative to a baby shower, where the focus is on the mother and supporting her in preparing for an empowering birth experience). Both times I felt babushkas were necessary for my hand crafted invitations to guests.
In 2007 I made these simple cards:


In 2010 I found this template for a matryoshka/paper doll style greeting card and sent the link to me. I fell in LOVE with the concept, but I wasn't keen on that particular shape for the matryoshkas, so I decided to make my own template to make a shorter, fatter doll.

I used a sheet of A4 paper, grey lead pencil and a stencil set with various sized circles to create my own template. I played around with overlapping, different sized circles until I got them to make the shapes and sizes I wanted. And I made sure they joined in the middle so I could concertina fold them closed.


Almost finished, they needed details (the middle ones were what they looked like open, side two are what they look like folded closed):


And then for the details...


I debated whether or not to put anything on the biggest one's belly, but (obviously) decided less was more.

They also had a little magnet on the back of them so they can be stuck to the fridge :) (coz who doesn't hate losing precious fridge magnets to new invitations, artwork etc that goes on the fridge?!).

By the end of this craft project I was having nightmares about these sweet little faces coming to get me, lol:


Tuesday, April 30, 2013

Zombie Cupcakes

Happy Haloween, Southern Hemisphereans! (Or Blessed Samhain). This time last year I was using the little recognised or celebrated festival of Samhain in the Southern Hemisphere as an excuse to learn how to craft a new, delicious treat: zombie cupcakes!

White fondant dyed green and molded into the shape of hands, attached to chocolate cupcakes with toothpicks. The broken ground is flake chocolate, painstakingly broken and crushed and chopped into tiny pieces and stuck onto chocolate icing. If I ever make them again, I'm going to do some grave stones on some of them, think it would look even cooler if not all the cupcake graves have been visited by the undead.
Aside from being kinda funky and delicious, these cupcakes were loads of fun. Before devouring the fondant we played many a hand gag with these little babies:
Zombie's gonna get him!
Zombie thinker

For my first go I was pleased with them. I still have work to do on my sculpting, definitely. As they were they were more Hulk than undead, so if I do them again I might add scars and stitches too. Big thanks to Zilly Rosen for her Zombie Cupcakes book, filled with All Hallows Eve themed horror deserts :D What a find, sitting on my table at the library one night I went to study!

Monday, April 29, 2013

Dinosaur Themed Craft

When our eldest was 2-3 years old she had a thing for dinosaurs, one of our favourite interests of hers :) she even has dinosaur bedsheets from that period. When she was 2, my friend Saree designed a dinosaur tail pattern to sew  for her daughter's dress-up collection and she generously shared it (and her felt and cotton and elastic and stuffing and sewing machine!) with me, so that I could make one for my daughter:


This purple tail remains is still a hit with the kids, and hangs on the back of edlests' bedroom door. Actually, writing this has made me think I should get onto making one for our second daughter too.

At the height of her dinosaur phase, we threw edlest a dionsaur themed birthday party. I created these invitations for her guests:


They read "Celebrate 3 years of that 'crazy guy'" because back then she used to refer to herself as "Crazy Guy", it was HILARIOUS, we have no idea where she got it from, but it was apt (well, except for the "guy" part, technically, lol). I had two different sheets of dinosaur themed scarpbook paper, one with larger dinos on it, which I cut all the T-rexes from to create a pop-up on the side. The back of that sheet was brown and patterned and worked with the rest of the colour scheme so I made the number 3s from that. And used the other sheet with small dinosaurs as the background.

I also used magnetic strips on the back of the invitations so they would stick to the fridge themselves. And I wacked all the details such as time, date and address on the photo of her.


For her birthday cake, I invested in a Wilton dinosaur cake pan and embarked on piping for the very first time (this was at the start of 2011). 

Once I got the hang of piping (I made many a practice dinosaur cake. By the time her party came, our family was so sick of cake lol!) I found that it wasn't challenging, just time consuming. But for how it looks at the end, it's really ace. I'm a bit of a fan of the Wilton cake pans and their piping instructions.

I had worried that it would be a waste buying a cake pan just to use for one birthday, but I was happily wrong. I've made many a dinosaur cake for friends birthdays and loaned the cake pan to others and I have no doubt we'll use it again for our second born at some stage and this baby still in my belly, some day.


And thus concludes my dinosaur crafting to date :)

Sunday, April 28, 2013

Granny Stitch Beanie

My 2 year old daughter's bestie celebrated her birthday this month. I decided to give hand crafting a yarny gift a go, and managed to create a granny stitch beanie in 3 different colours in time (thanks to the very long train rides between our houses, lol). 

My girls modeling the finished gift en route to the birthday party

I used this rainbow beanie pattern, with a few slight adjustments. I stopped increasing sooner, so at most there were 20 sets of 3 double crochets, and when it was long enough (which took longer than I expected, turns out two year old heads are bigger than I first thought! Thank heavens I have a two year old head to test these things on!) I single crocheted before tying off and calling it a day. As much as I would have loved to have added the ear flaps, it was a tad beyond me in the time I had.

The birthday girl was delighted with her gift, and my oh my, what a feeling to gift something hand made and for it to be so loved immediately! 

Birthday girl sporting her gift (& a cake-mix face!)


Rumour has it that in the days that followed, she wandered around with her beanie, proudly telling all that her friend's mummy made her hat #melt! Now my lot are each requesting a beanie of their own, but  the question is: just how much do they want it? Do they: "let-her-yarn-shop-alone" want it? That is the crux of the matter ;D

Saturday, April 27, 2013

Superhero Costumes

 Last year one of our eldest child's friends had superhero themed birthday. It was such a fun theme and simple to transform my family from every day citizens into their heroic alter egos ;)


I used felt to create the girls' superhero emblems and some sequined fabric that I will never ever use again. That fabric was so fiddly and moved around heaps and frayed, ugh, it was awful. But it did give a good result. I made two emblems each for the girls: one I sewed onto the back of their capes and the other on the front of a plain black shirt. 

I also used felt to create the girls identity-protecting eye masks. And again used the awful sequined fabric, cutting out their iniitals and hand sewing them onto the masks. I also made a couple of masts for Huz and I.
Their capes were made from plain cotton, hemmed, and then a series of small cuts were made towards the top of the fabric and a ribbon of the same colour cotton was threaded under and over each cut to make a neck.

The finishing touch was a great find at K-Mart: black leggins lines with silver sequins up and down the side seams. Easy, fun, and a great addition to the dress-up box after the party :)

Friday, April 26, 2013

Lego Cake

I came across edible lego cakes (as opposed to cakes built from real lego) in 2011  and knew I had to make one for Saree's next birthday as she openly admits the lego she buys her children is a gift to herself foremost ;) I made two different sized rectangular cakes, cut them up into as even portions as I could manage without using a leveler ;) Gave them a "crumb coat" which I learned from this video and stuck them in the fridge. After the cakes cooled in the fridge, I made blue, yellow and red butter cream icing, iced the cakes, iced the marshmellows and stuck them into the cakes using tooth picks.


I love the concept of lego cake, but I wasn't entirely happy with the end result. I hate smoothing icing. I suck at it and all I can think when I look at the pictures of this cake is how much more work it needed to look the way I wanted it to. I finished the cake about an hour, hour and a half before we had to go to Saree's for dinner, and I spent that hour/hour and a half touching up, I could not stop!


Saree was pleased with her lego cake. My eldest was inspired to create a lego cake of her own (sort of, lol):


But unlike me, she was pleased with her end result. I could learn a lot from this kid!

I think if I try the lego cake again, I'll see how much smoother I can get it with fondant instead of butter cream.